YOU ONLY LIVE ONCE...MAYBE TWICE!
(so i saw two great projects that didn't quite work and thought. if i put these together?! so here it is the "improved candle car heater" just combine this...)
How to Make a Candle Heater
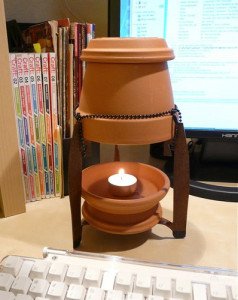 With the cold season coming to a close I wanted to share one more survival craft that you can do in order to provide some off-grid heat to a small insulated area with just a candle!
I got this idea straight from the HeatStick.com site, where instead of ordering one of their “Kandle Heeters” I decided to make my own and share with you guys how you can too (it cost me about 15 bucks to make compared to 30 dollars (plus shipping) if you were to buy one).
How it Works
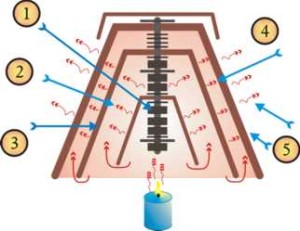
The basic purpose of this heater is to capture the heat given off of a candle flame and to concentrate it into a steel and ceramic radiator assembly. After some time, the ceramic surface will act as a thermal mass and begin to radiate the captured thermal energy into your room or office. Here’s how heatstick.com describes it (image and description c/o heatstick.com):
Putting it all Together
The process for putting together the candle heater is very simple:
What You Need
- one 4″ ceramic (not glazed) pot
- one 2″ ceramic (not glazed) pot
- one 1 1/2″ ceramic (not glazed) pot
- two 1 1/2″ x 1/4″ washers
- three 1 1/4″ x 1/4″ washers
- three 1″ x 1/4″ washers
- eight 3/4″ x 1/4″ washers
- seven 1/4″ nuts
- one 3″ x 1/4″ bolt
Assembly Instructions
I think that the easiest way for you to learn how to put one of these heaters together is to follow the cutout image (to the left) I used from the heatstick.com site:

Just place the washers and nuts in the right combination as the image and you’ll be good to go. Looking inside, it should look something like this:
Making the Stand
(with this)!
How to Make a Survival Stove (Car Heater)
With winter coming soon for many of us who live in the colder climates, getting stranded in your car can become a dangerous possibility. As a result, everyone’s emergency car kit should contain the ability to heat your car if you were stranded or holed up waiting the passage of a winter storm.
Even if running your engine is an option, you may need to conserve fuel for the return trip. Also, carbon monoxide can build up inside a standing vehicle while the engine is running, even if the exhaust pipe is clear. In this article, I will be demonstrating how you can make your own survival heater for your car that is cheap, safe to use, and easy to construct.
What You’ll Need
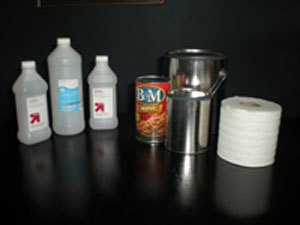
- A small empty metal can: You want this to be slightly taller but thinner than a standard roll of toilet paper. My can of choice is an unused 1 quart aluminum paint can found in most hardware stores. You can also use an empty food can that fits this description.
- A larger metal can that can easily accommodate the first one: I use a 1 gallon unused paint can (again found in most hardware stores). Another option is a coffee can, metal bucket and so on.
- Some type of lid that can be placed over the larger can: I also like to get a lid for the smaller can for which I will explain later.
- Toilet paper (unscented)
- Six bottles of 70 to 91% isopropyl alcohol (rubbing alcohol)
- Matches or some other fire starter
How to Put it All Together
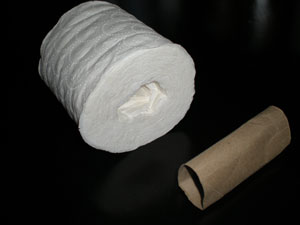 Prepare the toilet paper: The first step is to take out the central cardboard tube from the toilet paper roll, leaving only the paper behind.
- Squeeze the paper into the smaller can: Next you’ll want to squeeze and roll the paper into the smaller can. If the can is so small that a full-size paper roll has no chance of fitting inside it, then you can remove some of the external sheets (just like you would if you were going to the bathroom) until it does squeeze into the can. It’s important that it fills up the entire volume of the can.
- Add the fuel: If you are now ready to use it, simply add the alcohol until the toilet roll inside the can is completely saturated. One of the benefits of using a 1 quart unused paint can is that you can store the stove with the fuel already added by placing the air-tight lid over the can. This saves space and allows you to have more fuel available. The lid can also be used to control the output of the flame which I will explain below.
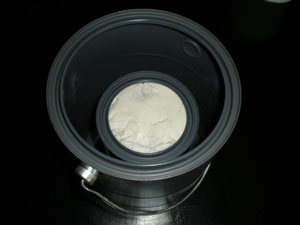 Place the smaller can into the larger one and position it in your car: The larger can provides an insulating barrier and some protection for passengers and your car. You’ll also want to position it in a place that’s far enough from anything combustible. Use the palm check. Put the back of your hand against the surface you’re worried about and if you can’t keep your hand there without burning it then it’s either to close or you’ll need to adjust the flame.
- Light the stove: First, open the window just a crack to provide some airflow and then carefully place a match (or throw some sparks using a firesteel) onto the saturated toilet paper and viola! you’ve got yourself a burning stove. Use caution in lighting as it will combust very quickly. It’s best to partially cover the smaller can with a lid to decrease the size of combustion (you can always increase it later (see next section).
Controlling the Burn Rate

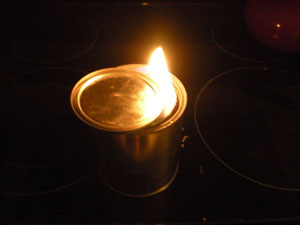
You may notice if you follow the steps above, that a pretty sizable flame results from having the smaller can’s opening completely exposed. While this is fine if you want to warm up faster, it does tend to go through the fuel fairly quickly and is not so efficient. A better way is to partially cover the smaller can with a lid. Or if you used a 1 quart paint can, you can make a small hole (about the size of a quarter) in the lid it comes with and place that on top of the can. Both of these methods control the burn rate and allow the stove to provide a constant heat.
Another option is instead of completely saturating the toilet roll (as indicated in step 3 above) you can pour just a few ounces of alcohol on the paper and regularly add more as it burns out. This will also control the size of the flame and conserve fuel. I prefer to use the lid method over this one since you don’t have to regularly add alcohol (it’s nice to sleep for a stretch of time and not have to regularly add fuel).
Views: 355
Replies to This Discussion
-
I can see combining the top of the heater and the survival stove...Just a simple question, wouldn't you have to make a small base, using the top or lid of the survival stove to allow the space needed to heat up the bolt and the pots??
Just asking, cause the combining of the two would make a really good heat source....
-
just use a modified version of the angel bracket base from the candle heater.
© 2026 Created by Komrad Venessa Wicked☭.
Powered by
![]()
